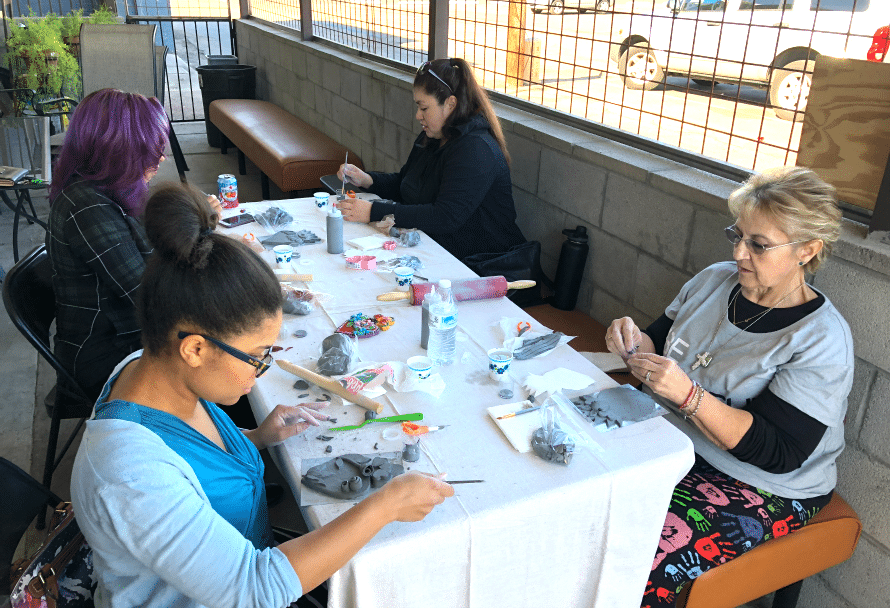
This beginner ceramic workshop was so fun, and definitely a lesson in teaching for me!
I’ve been working in ceramics for several years now and while I’ve taught many painting classes, I finally taught my first clay workshop!
I bet you are thinking, “What’s the big deal?”
Well, wet clay can be very moody. Pair that with guiding 18 people to create artistic magic and anxiety will make an entrance.

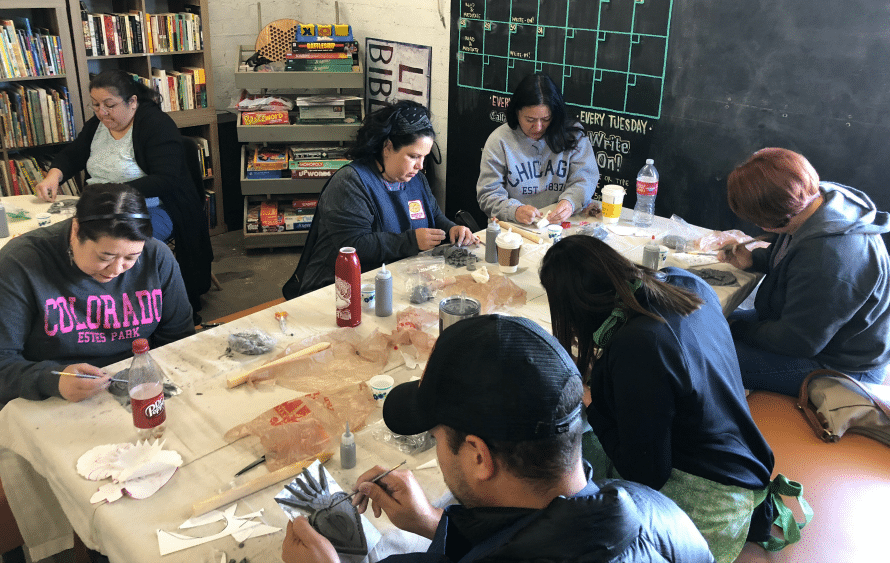
Overall, the class went great. We had a full class, everyone was super kind and excited to learn and as far as me teaching, it was a new experience I’ll never forget!
Supplies for this ceramic workshop
Canvas dropcloths for table covers (I bought mine at Lowe’s for $10 each)
Clay – low fire for the kiln or air dry clay from the craft store
Rolling pins
Slabs of clay rolled and cut, placed on cardboard backing, covered with plastic. We cut these the night before and placed them in plastic bins I bought at the dollar store. Make sure to seal it up tight!
Slip, dollar store paintbrushes, little cups to hold the slip, Dixie cup of water
Craft knife or even plastic knives
Drying racks
Patterns
Mini cookie cutters
Patterns that are cut out
Directions:
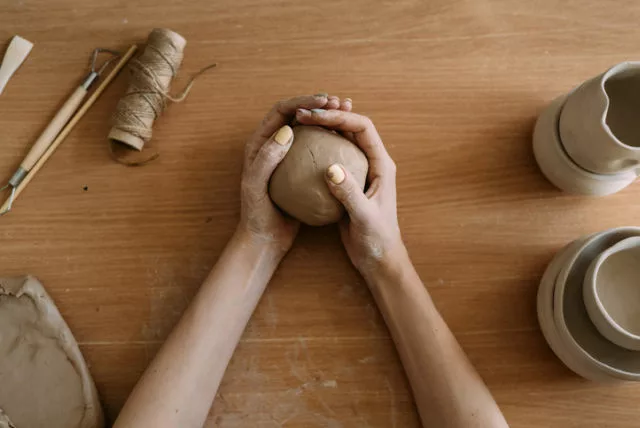
Give each person a ball of clay and the supplies listed above. you can have them share tools if it is a one-time class. I knew i’d be teaching several clay classes so I invested in a set for everyone.
Have them roll out their clay into slabs that are about 1/4″ thick.
Place the template on top of the slab and trace/cut it out with the craft knife.
Smooth the edges and use slip to add embellishments.
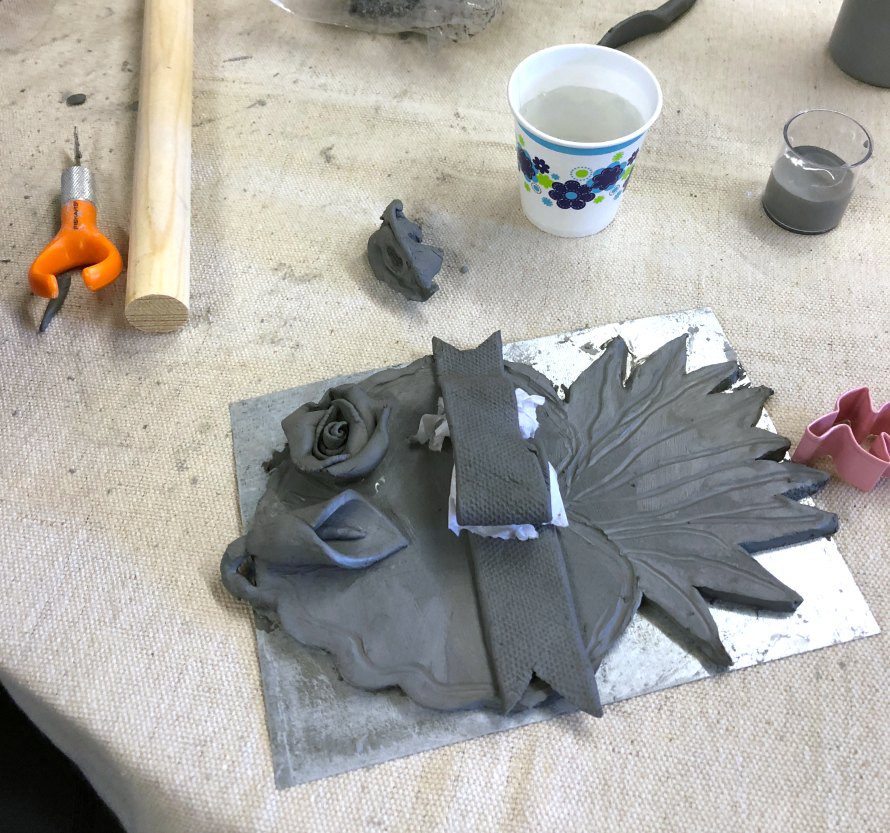
Once everyone is done, ask them to create two little holes at the top so they can attach wire to hang it after it is fired.
Firing and drying process
Keep the hearts from your ceramic workshop loosely covered with plastic. If you let them air dry without plastic, they will warp and even crack. For pieces like this of this size, they will take at least 48 hours. Let them dry on a rack if possible.
For low-fire clay, fire at cone 04, slow speed. This is called bisque firing and they will come out bright white.
For air dry clay, the 48 hours should be enough drying time. They will look a brighter color.
Painting the clay
For both air-dry and low-fire clay, after they are dried/fired, they are ready for painting. Either with craft paints or for the fired ceramic piece – ceramic glazes. Then it goes back in the kiln at cone 06, medium speed.
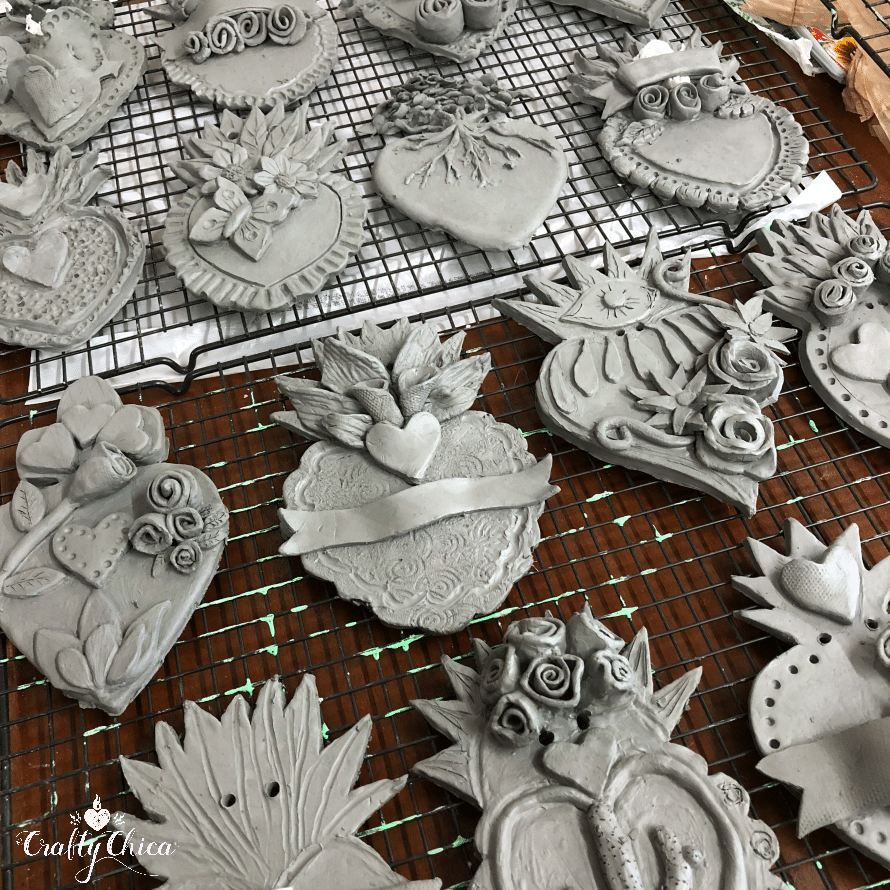
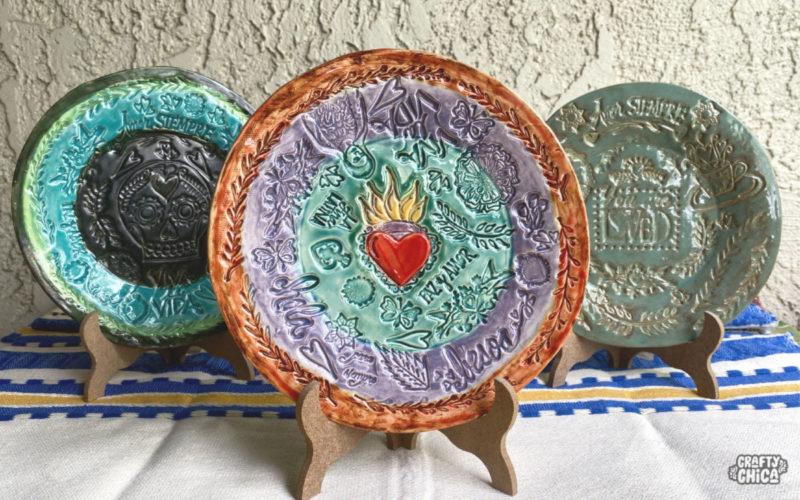
Here are my samples I made to show the students inspiration for their own creations.
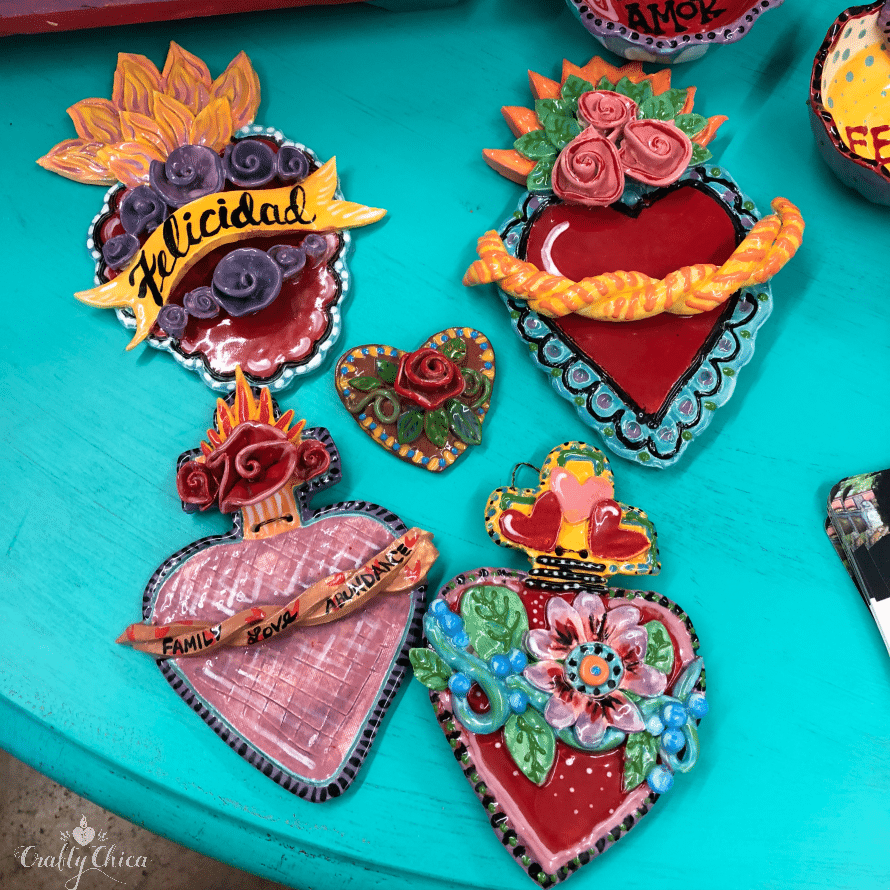
I offered two patterns for them to choose from. This made the class more interesting because no two hearts looked alike.
Check out these bowls I made as well. This could be another class!
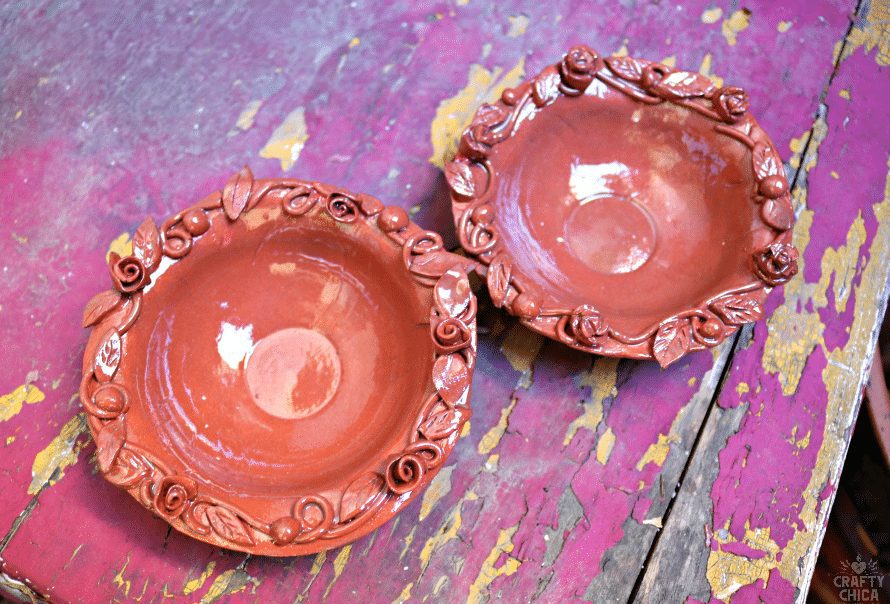
I’m used to teaching to 25-50 people at a time, but I didn’t want to go that far with this class until I went through the process. Now I feel confident to teach a bigger class – or I will be after these are all fired.
My (almost) claytastrophe
Want to know about my flub? I had a stack of 5×7 flashing (metal sheets) pieces. As Patrick and I cut the rolled out the clay the night before, I placed a flashing piece under each slab before putting it in the bin.
I would normally have them use cardboard, but I thought I’d be all smart and use up the flashing. It had been in my studio for years.
As the students created their hearts, the hard base gave them stability and made them easy to maneuver around as they added the cut and rolled embellishments on top.
One-by-one. they each completed their masterpiece and proudly, lovingly and ever so tenderly handed it to me for safe keeping. They said things like, “I love this so much! I’m so proud of this! This is so meaningful to me!”
On the outside, I cheered them on and let them know how their work was so impressive!
knew I made a huge boo-boo and their work might be at risk.
I swore I would have a mental meltdown from stress!

Why? Because the flashing is nonporous.
How in the world would I remove their clay pieces without damaging a detail? The clay was wet and sealed like a prom kiss to the shiny metal plate.
The last thing I wanted was to break all their hearts – literally!
I texted my friend Lisa from Duncan Ceramics (my ceramics guardian angel) and she quickly replied to inform me the flashing would act as a suction… as the clay dried it, would crack.
Like that scene in Titanic when the ship’s architect say “This boat is made of steel. I assure you, it will sink.”

Emergency action!
Her advice: Remove them from the metal flashing immediately!
Crap! I thought. How? Oh lawd. This would not be an easy feat.
I whispered at least a gazillion Hail Marys because I would have to secretly (after everyone left) semi-manhandle each of these hearts to pry them up away from the flashing base and gingerly transfer them to the drying rack.

I cut a long piece of wire and strategically wrapped it around each hand and held down the flashing base, I went in like a surgeon and slid the wire underneath each clay heart from bottom to top to break the seal of the clay from the metal.
Then I chanted more prayers as I carefully peeled up the soft clay sculpture.
I only could remove half because the others were to too juicy to consider touching. I covered everything in plastic, left it all to tighten up overnight and returned today with high hopes.
GOOD NEWS!
The remaining hearts dried just enough to make them easy to remove from the flashing. As I type this, all the sacred hearts have been moved and are happily drying nice and slow under a layer of plastic. Not a single ripple of damage or alteration. It all worked out!

But…next comes the firing. They have to be BONE DRY otherwise they can explode and break every other piece in the kiln. See what I mean about me being excited to teach my first clay workshop? A lot is involved!
Are you still reading this? It’s a crafty TMI blog post, I know. But I lost sleep over this drama and nearly chewed off half of my gel nails. Wish me luck for the firing process!
And that was my drama for the day! Thanks for checking out my post abut my beginner ceramic workshop!


Those are amazing! Do you have the patterns for sale that one could use if we wanted to make these at home?
You need to trademark “sealed like a prom kiss” lol- hilarious!
These are beautiful! I’d love to try this.
Thank you!!
What brand of clay do you use. I love these so much I really want to give them a try.
Oh, how I would love to be in your class!
Hello Mrs. Murillo! I’m an elementary art teacher in San Antonio Texas. I’ve been a follower of yours for years! I love the work you and your husband do. Such an inspiration! I wanted to reach out and ask what brand of glaze you use and how you apply it? I would love to see a tutorial on the process. Your work is always so vibrant and beautiful. Thanks for all the inspiration over the years <3
Hi! I use Mayco Stroke and coat and Duncan Concepts and dipping glaze from Colorrobbia!
Can you let the pieces dry and paint them and then fire them?
These are stunning!! Do you have a resource you can suggest for your molds? They’re amazing!!!
For kids, or if you don’t have access to firing equipment, you could use flour and water clay. Bake and paint, seal with Mod Podge or something like that.
Hi these are so lovely. Could I purchase your templates please. I would love to try this.
Thanks
I love them. I’m a Latina too. I want to try this beautiful hearts. Can you share o sell me your templates? My email is
[email protected]
Pleaseeeee 🙏
I love them. I’m a Latina too and I would love to make this beautiful hearts. Can you share or sell me the templates?
Please 🙏
Great idea!
What brand of paint does d you use on your beautiful corazons? You mentioned the glaze, but not sure the paint.
Hi! I use Mayco Stroke and Coat for the fired ceramics and multi-surface paint for general crafts!