I knew I wanted to make soldered glass ornaments for my Bernzomatic project this month. The hardest part is narrowing down ideas! I recently visited a local stained glass shop and came across a huge bin of frosted and textured glass scraps!
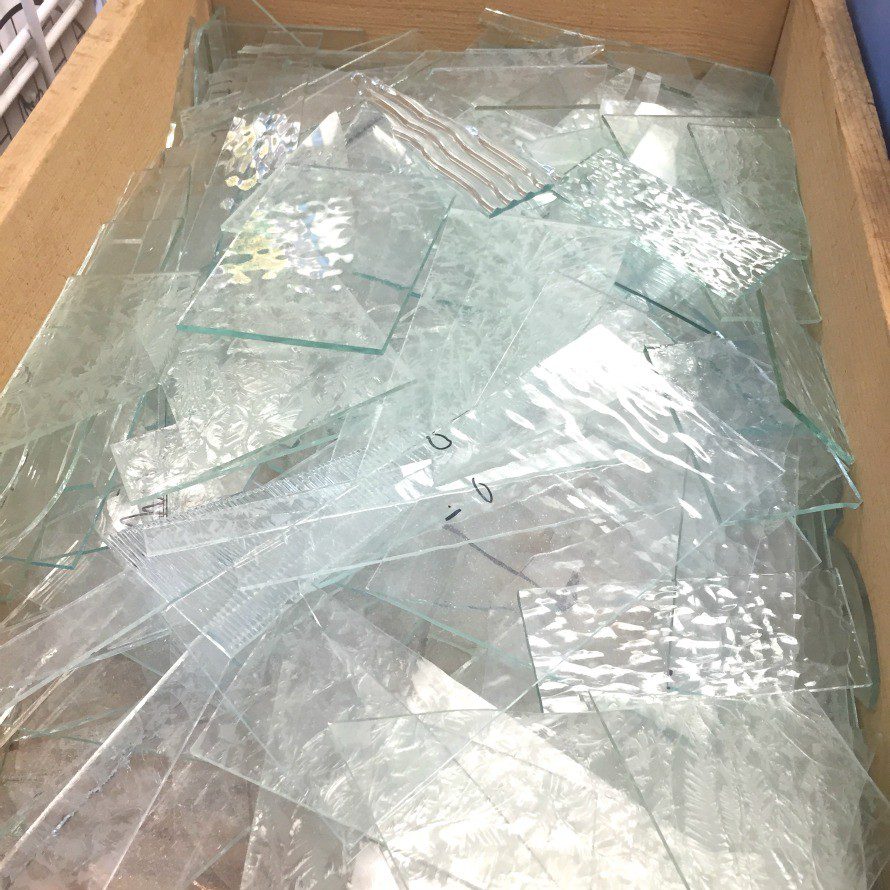
I sorted through the pieces, one-by-one and chose some for nightlights and other smaller pieces for ornaments.
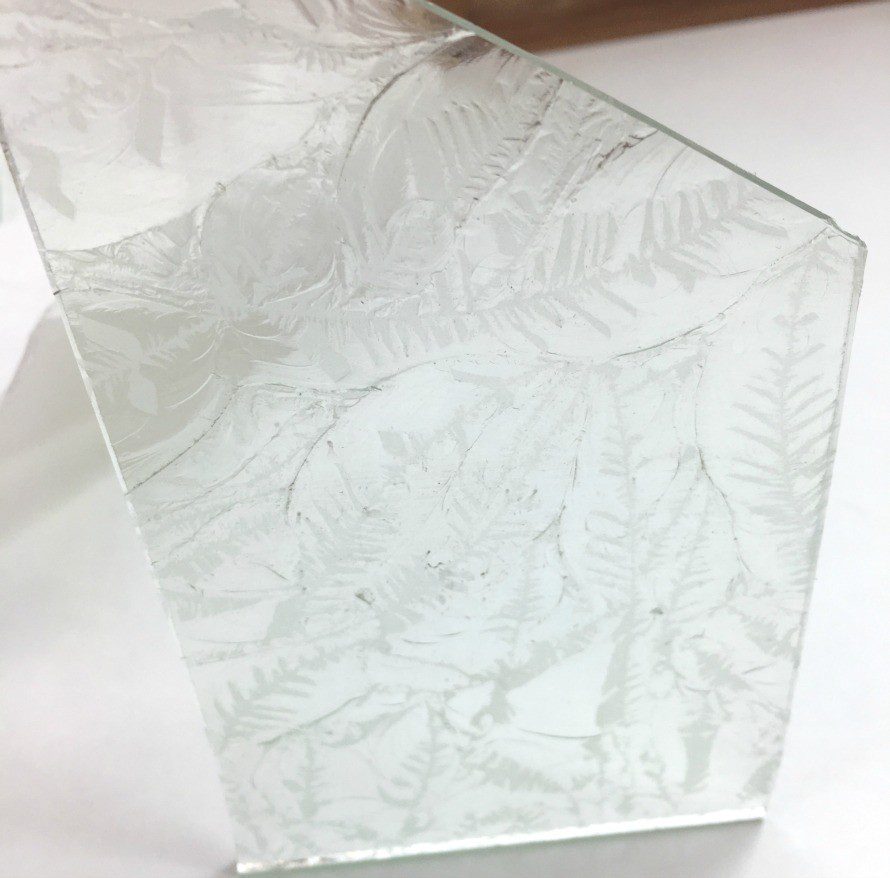
This glass is beautiful because if you look closely you can see designs and patterns that have been etched. I thought it would look even prettier with the light bulbs shining through on a tree!
SUPPLIES:

Frosted glass pieces
Jump rings
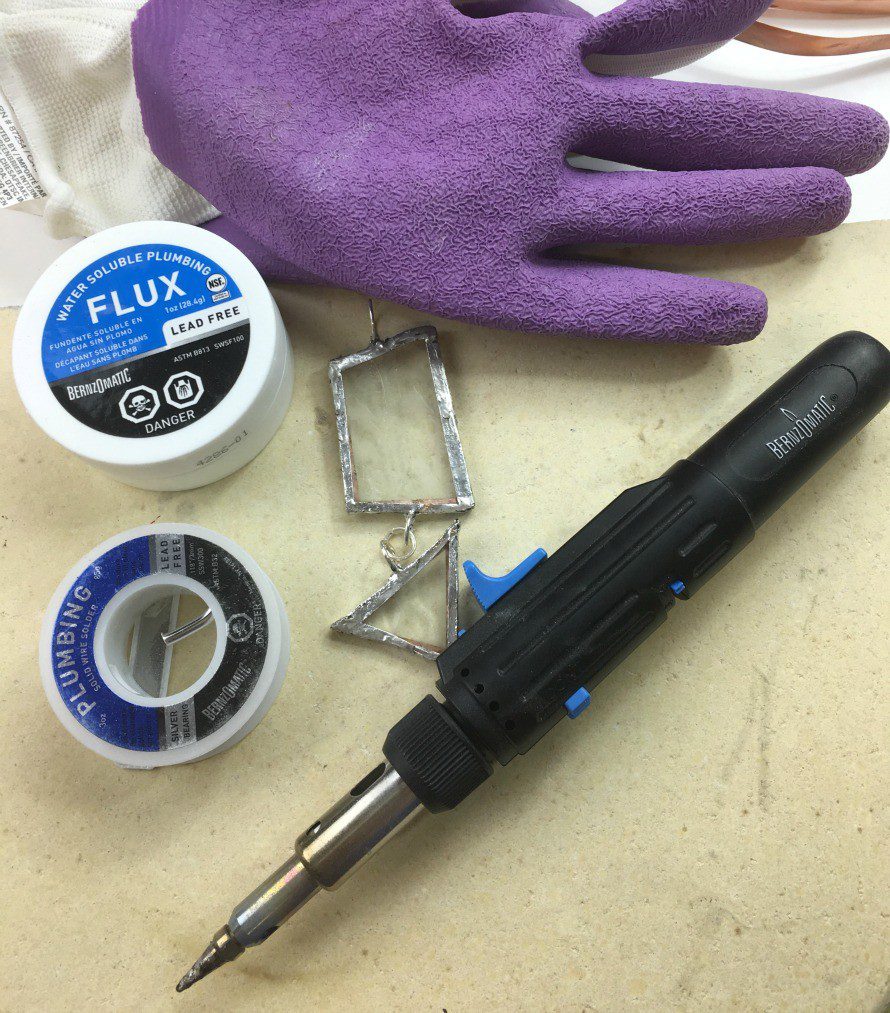
Bernzomatic ST500 3 in 1 Micro Torch and Soldering Iron
Bernzomatic Water Soluable Plumbing Flux
Bernzomatic Solder wire, brush
Goggles, gloves
Copper Tape
Clamps
Tweezers
Burnishing tool
Kiln brick or other heat absorbent surface
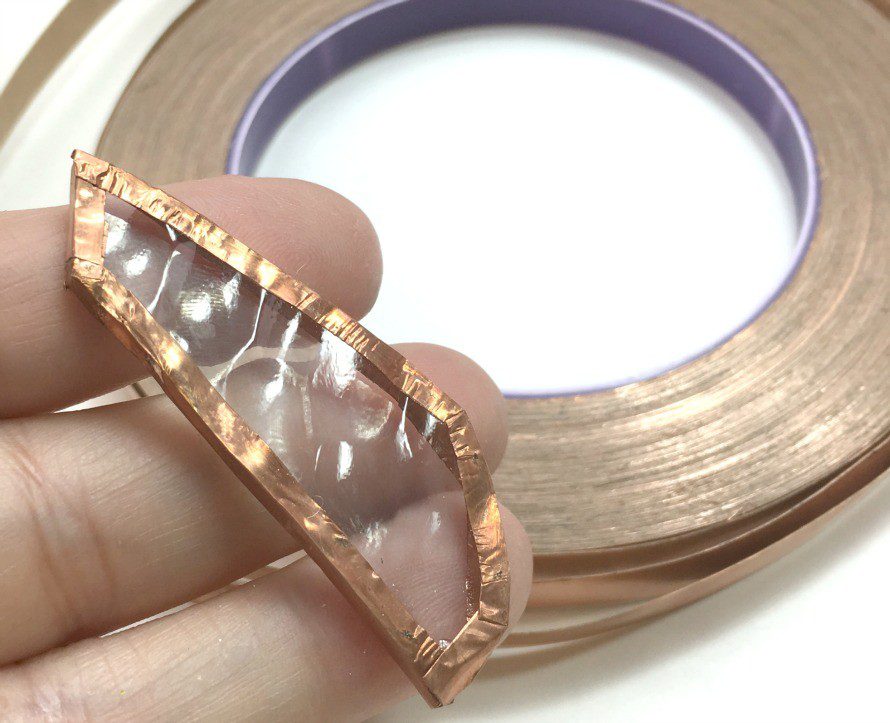
Apply the copper tape around the piece of glass.
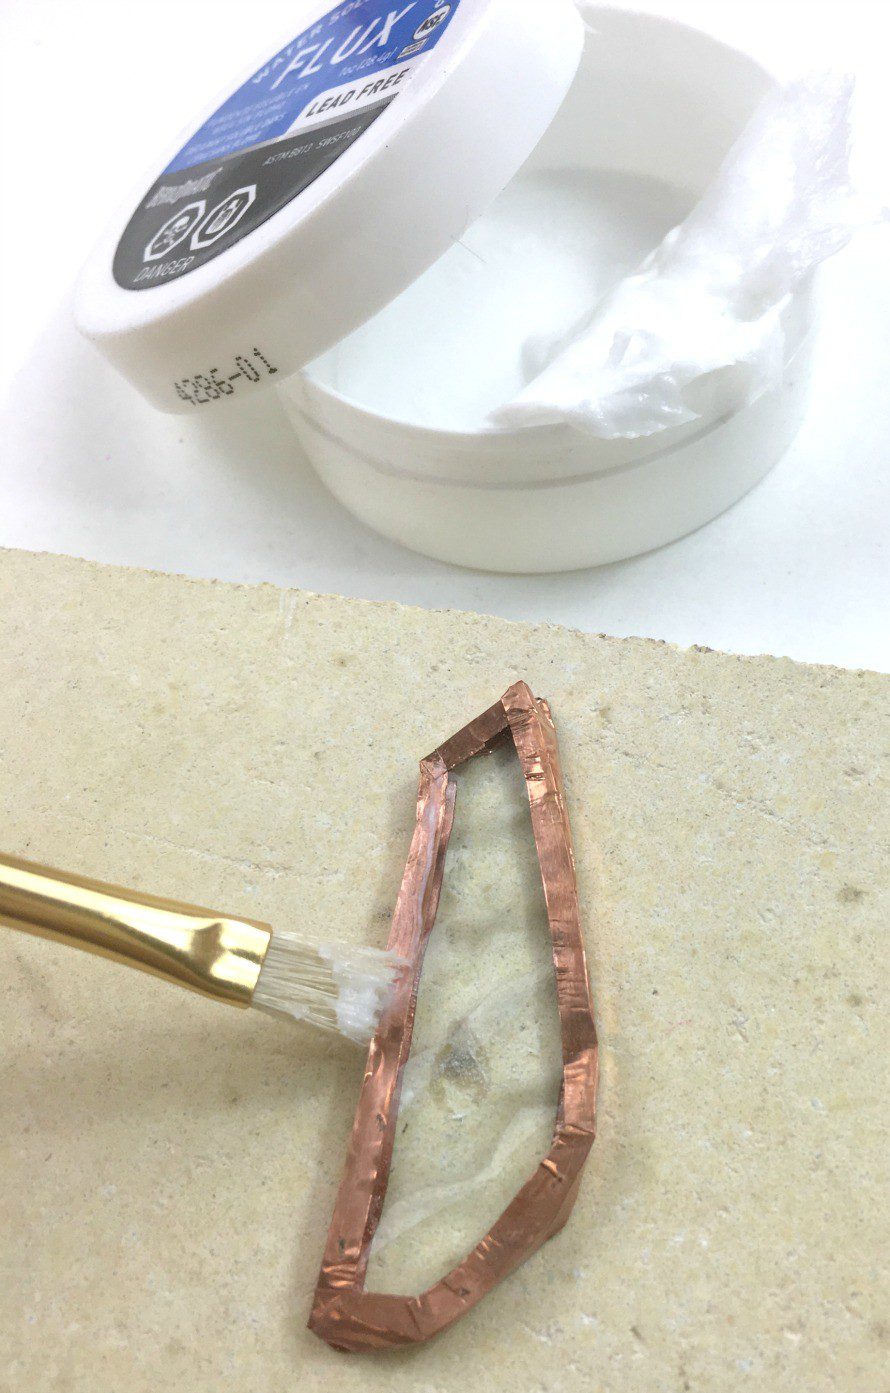
Brush on a layer of flux.
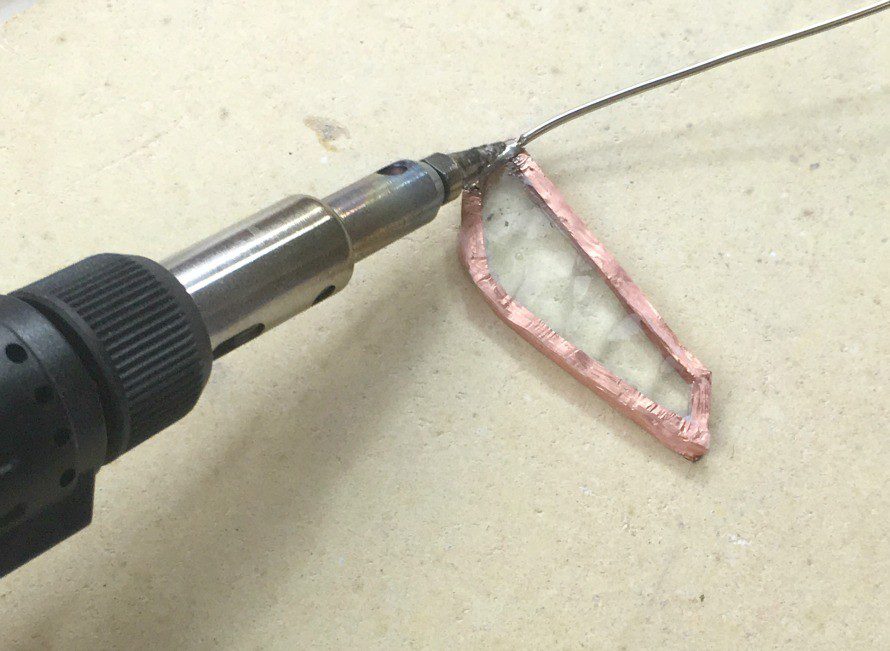
Wearing the gloves and goggles, click the safety latch on the Bernzomatic soldering iron and click the “continuous” button. With the hole facing up and away from your face, touch the iron to the solder until it melts, then drag it along the copper tape.
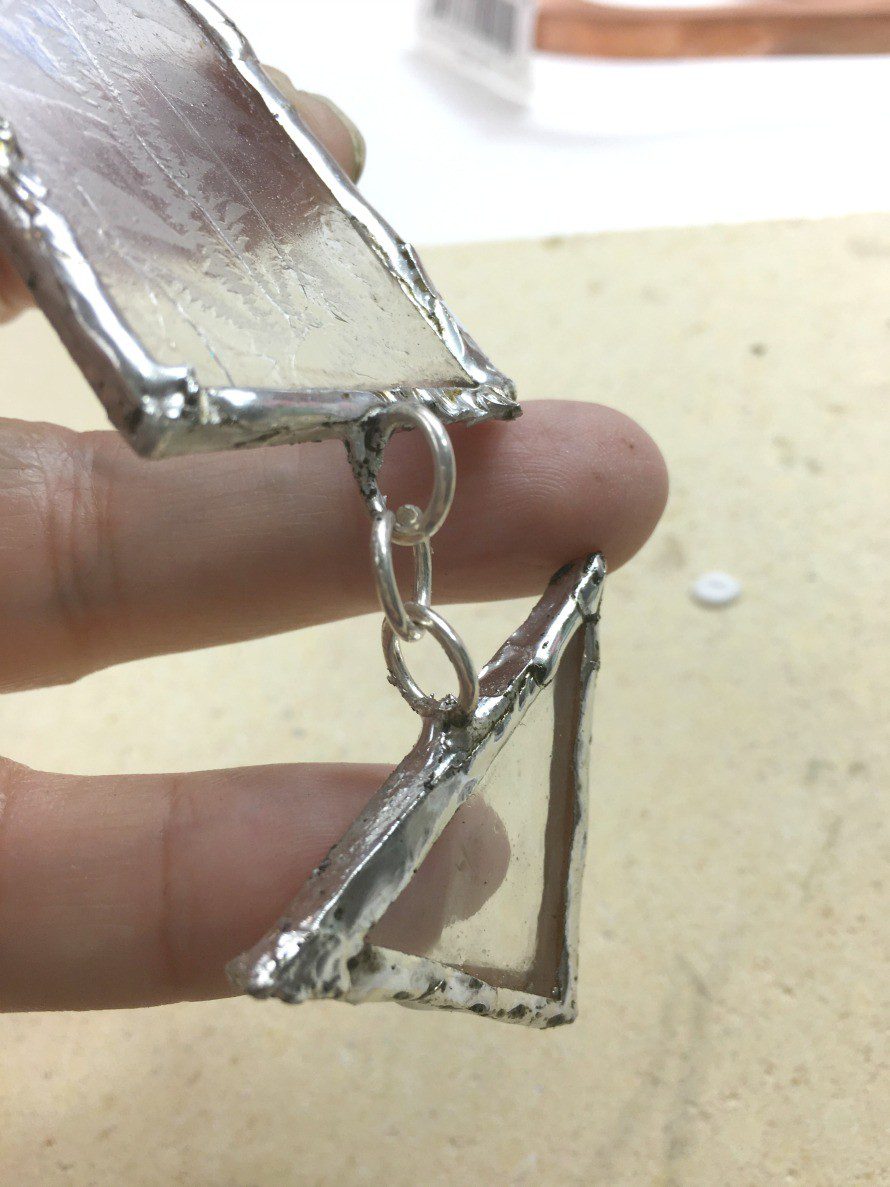
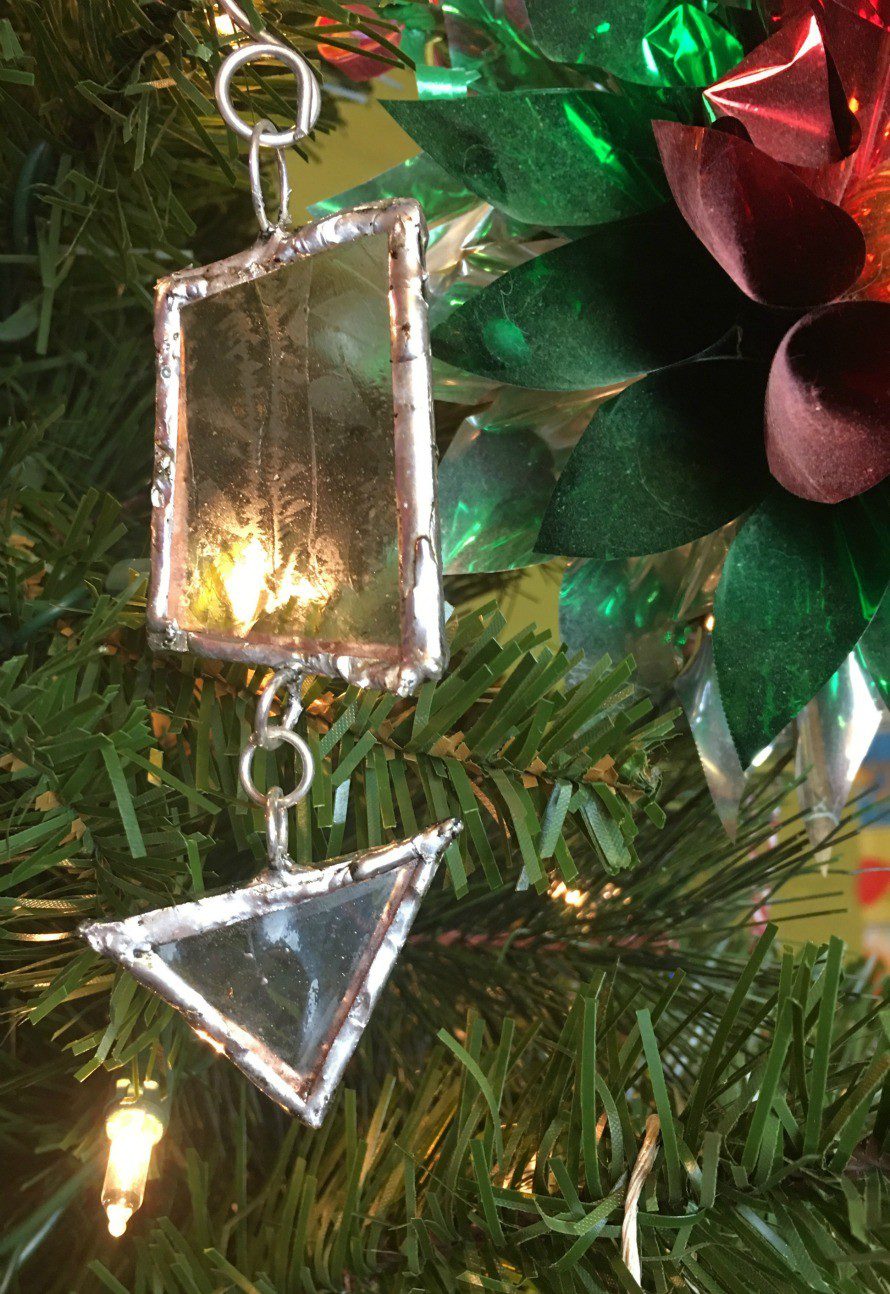
Add copper tape around the jump rings and add those so you can connect the soldered pieces. This will give the ornament fluidity and movement on your tree!
Keep making more ornaments! If you want to use unfrosted glass, you can add color with glass paint or even glue wrapping paper behind each one to show through.
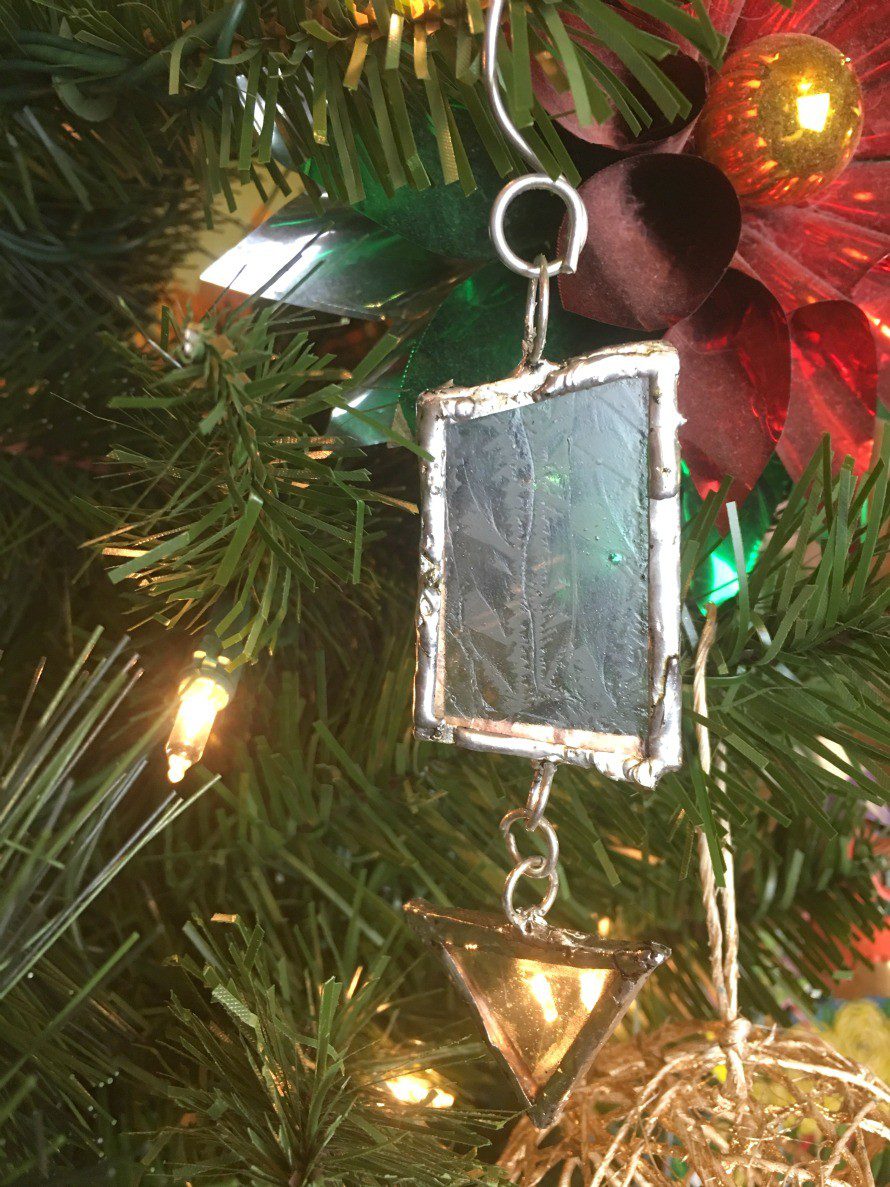
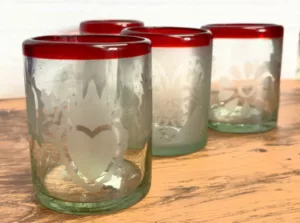
I have a lot of colorful ornaments on my tree, so adding these neutral accents brought the whole look together. It looks so cool to see the lights shining through the glass, just how I imagined it!
Thanks for checking out my project!
![]()
This post is part of a sponsored campaign with Bernzomatic. All ideas, opinions, and the excitement to work with this new art genre are 100% my own.
Be sure to follow them!
· Facebook: www.
· Twitter: @
· Instagram: @
Related content: