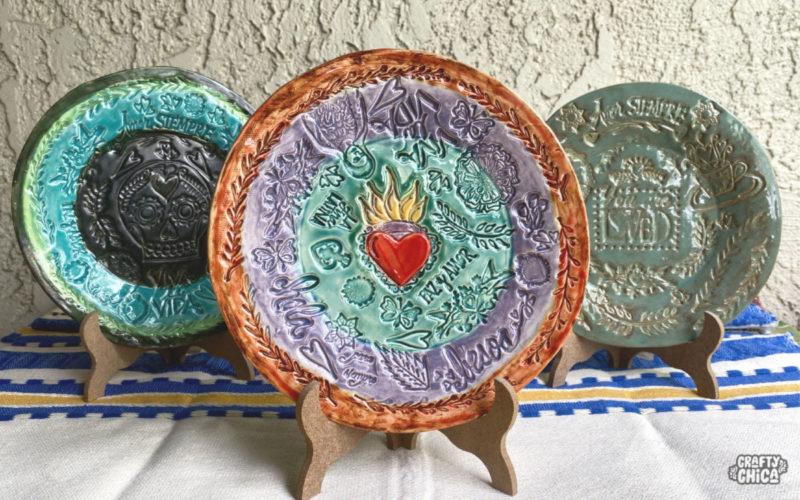
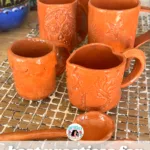
Here is a beginner’s guide to hand-built pottery mugs – handmade ceramic mugs, in fact. I just finished my second batch using low-fire clay in my kiln and am so excited. I’m ready to keep working at this to improve my skills.
In the meantime, I love how these handmade ceramic mugs came out perfectly imperfect! I’m still steep on the learning curve but thought I’d share my journey so far.

It is definitely a process
Rolling the clay, making your design, piecing it together, firing it, glazing it, etc…
I look on Instagram and get inspired – and then depressed. I still have a long way to go – you know, that 10,000 hours thing that makes you an expert? But the only way to get there is to keep practicing!
https://media.giphy.com/media/bLcMOxvIak4iZieaut/giphy.gif
If you are a newbie like me to hand-building mugs, let’s do this! And if you are a pro, then please don’t judge. We’re getting there, okay?
What is hand built pottery?
Hand built pottery is a type of pottery that is made by hand, without the use of a pottery wheel. Instead, the clay is rolled into a flat sheet and then shaped into the desired form.
Hand built pottery has a long history, dating back to the earliest cultures that used pottery. In fact, some of the earliest examples of hand built pottery have been found in China and date back to around 10,000 BC.
There are many benefits to hand built pottery
It is a very accessible form of pottery since it does not require the use of a pottery wheel.
It allows for a great deal of creativity and individuality.
Each piece of hand built pottery is unique.
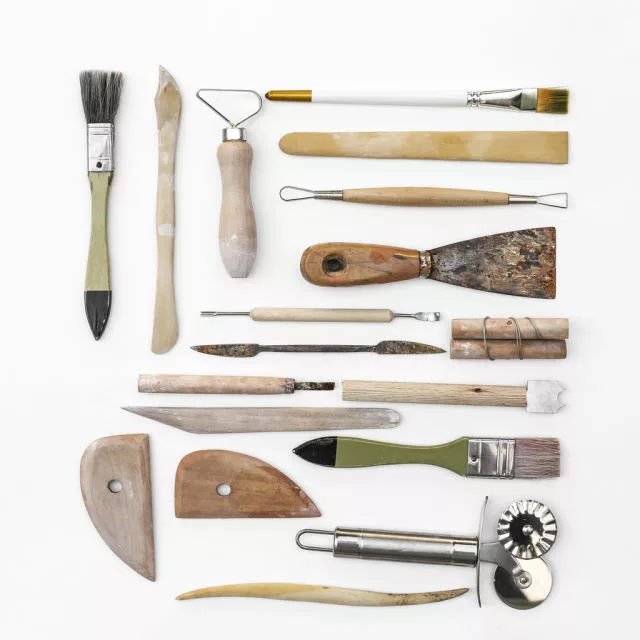
If you are interested in trying your hand at hand built pottery, there are a few things you will need. First, you will need some clay. You can purchase clay at your local craft store or online. Second, you will need some basic pottery tools.
These include a rolling pin, a knife, and a shaping tool. Finally, you will need a kiln to fire your pottery.
How to get started with handmade ceramic mugs
I don’t have a wheel or a slab roller, but lacking tools never stopped me before. But I do have a kiln!
If you don’t have a kiln, check out your local pottery studio or even community center for ceramics classes.
Another option is to use air dry clay, but your mug will not be useable as a mug, it will be for decoration only.
SUPPLIES for hand-built pottery mugs

Low-fire clay
Craft knife or scoring tool
Slip
4″ round cookie cutter
Rolling pin
Two wood rulers, flat
Water
Cooking cooling rack
Plastic covering
Canvas covering
Directions for handmade ceramic mugs
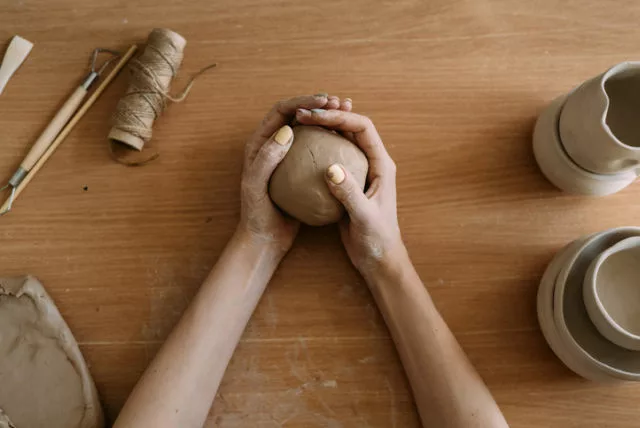
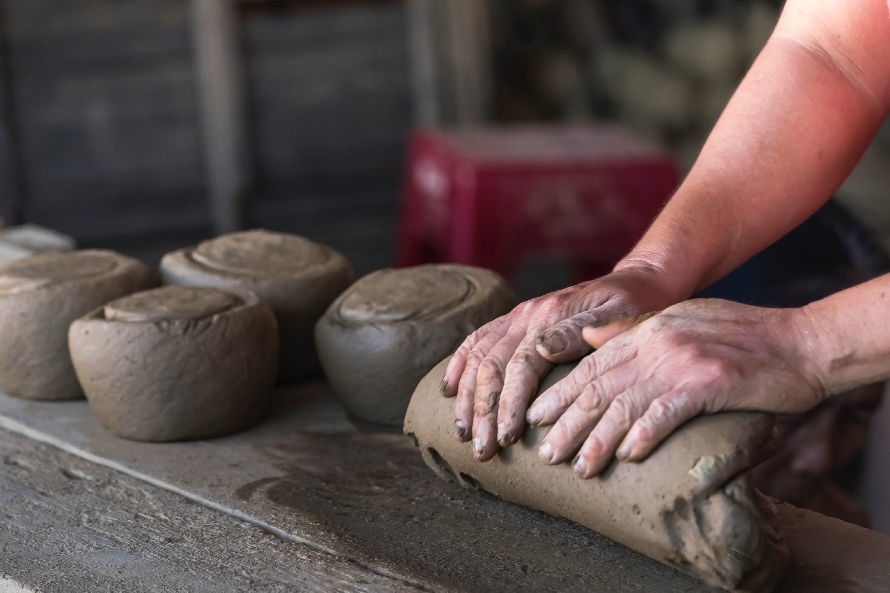
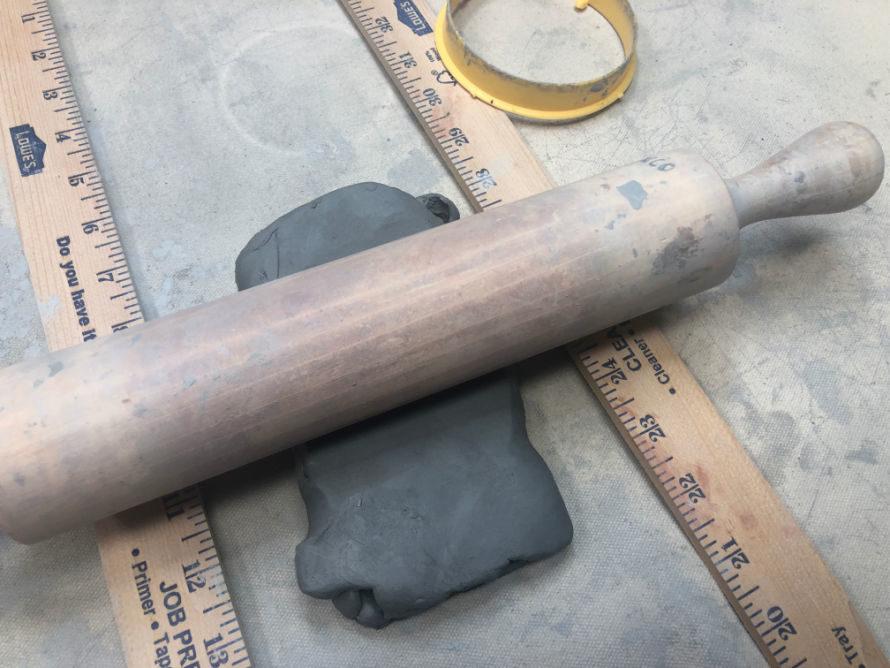
The first step is to cover your work area with canvas. Then set down the two rulers (mine is a yardstick broken in half). Condition a ball of clay and then press it flat between the palms of your hands.
Set it down between the rulers and roll it flat.
TIP: It cannot be thinner than your pinky, it will be too fragile and break. And it can’t be thicker than your thumb because then it will need a hole for moisture to escape and it will expand and break. I always use these sticks and have never had either problem.
Use the cookie cutter to cut out a base.
Repeat the above to create a 3″x12″ slab that will be the wall of your mug.
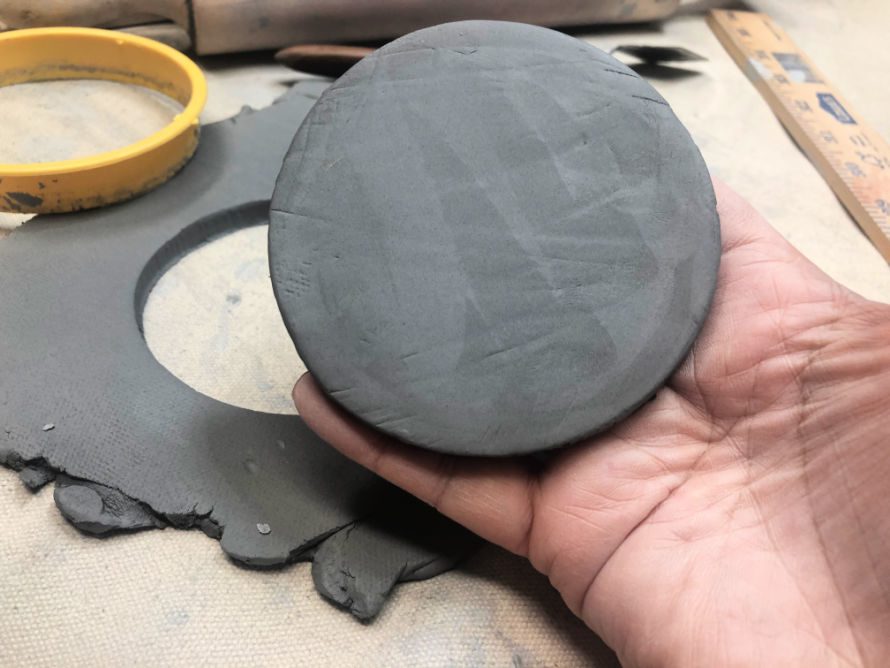
At this stage, if you want to use cling or rubber stamps to make impressions on the outside wall for your mug, do it now.
It will press out your clay, so you’ll need to cut a bit off in the next step.
RELATED: Kiln tips for newbies!
Build the mug
There are two ways to go about this. I’ve done both and can’t decide which I prefer.
The first way is to score the outer sides of the base and the lower inner side of the wall. Use a paint brush dipped in slip and add it to the scores.
Then carefully wrap the wall around the base until the two ends meet. Cut away excess.
Score the sides of the ends and mesh them together carefully and neatly.
The second method is to score the outer top area of the base and the bottom of the wall slab. This will make your mug more narrow.
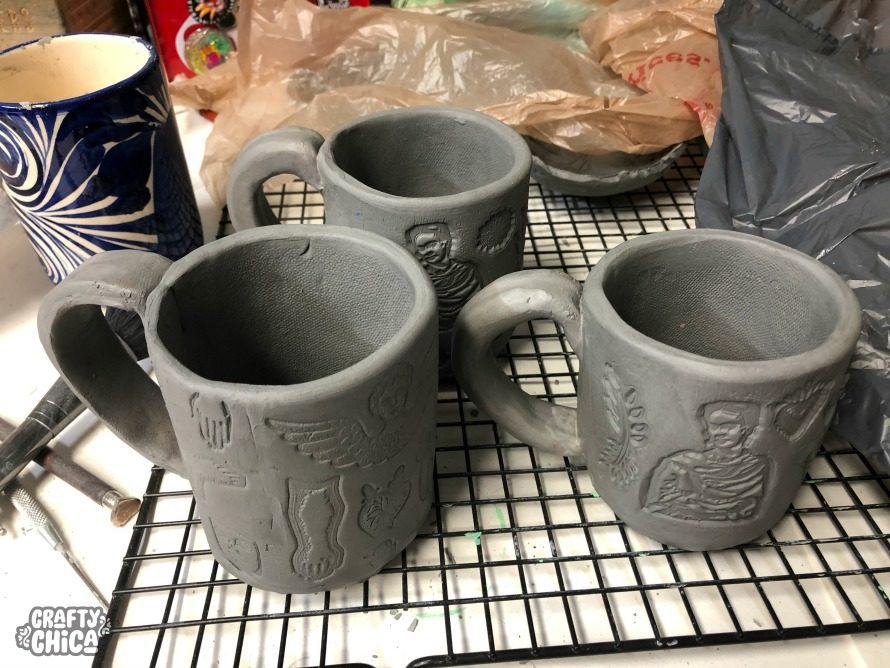
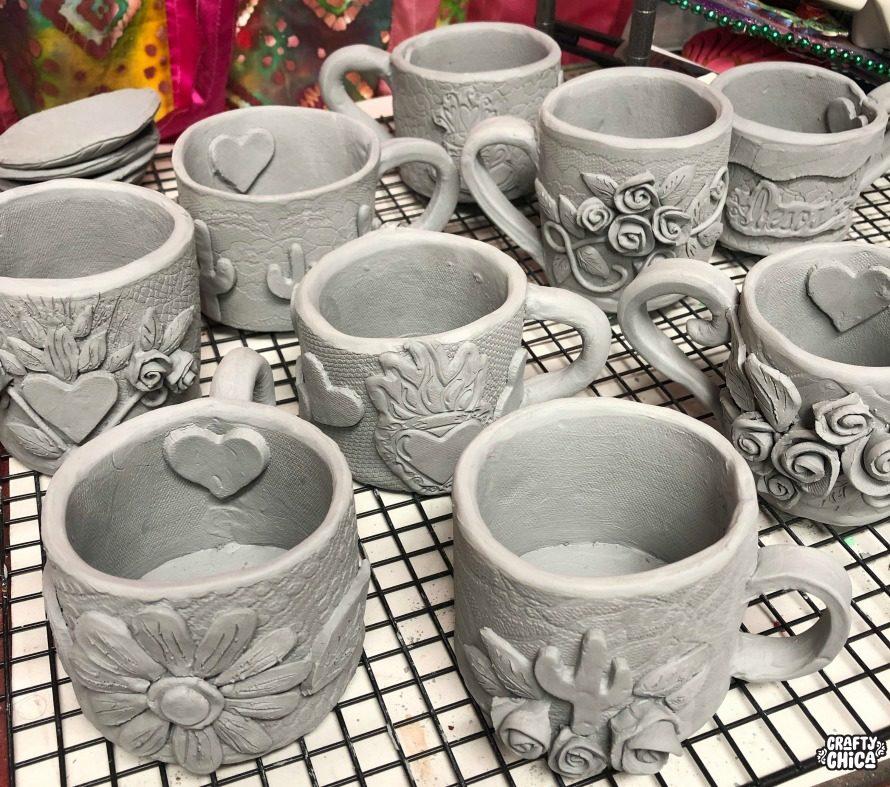
Embellish
At this stage, you can score other small pieces to add on or let it dry a bit and then carve into it. It will take several hours to cure to a leather stage.
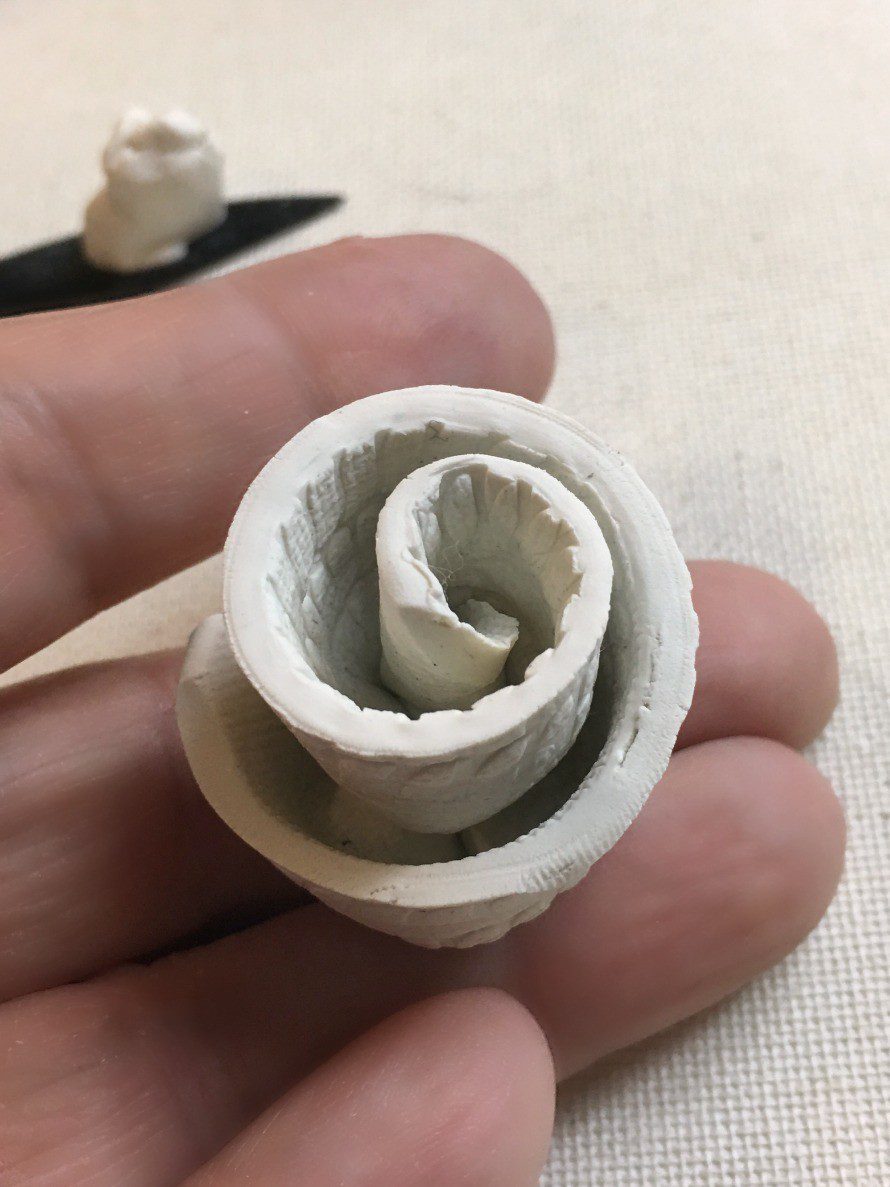
I usually cover mine with plastic for a bit and then make roses and leaves and then go in and add them.
Again, scoring and slipping along the way – if you do not properly score and slip, your pieces will fall apart as they dry. I’ve experienced this!
Always keep your pieces covered with plastic, otherwise, they will air dry too quickly and curl and bend.
You can insert a plastic cylinder to help it keep a round shape.
Handles
This video about three ways to make ceramic handles really helped me!

Eek! Handles are the most troublesome. But there are ways to make it easy.
Pinch off a piece of clay and roll it into a narrow piece. Use wet fingers to pull the clay to the desired look for a handle.
Once you have a handle you like, audition it on the mug to check for height, and if your fingers can fit through nicely. Attach it the same way to you connected the slab to the mug base.
TIP: Do not wait too long to attach the handle or embellishments. If you add wet clay to dry clay, it will crack.
Fine tune
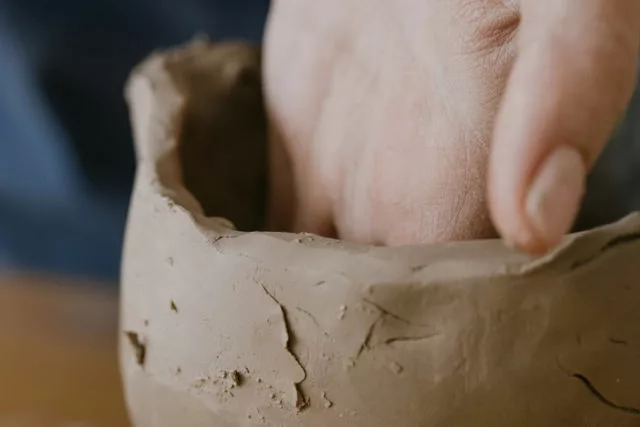
Let your mugs rest under the plastic for a bit, then take them one by one and use water and a sponge to shape the top ridge.
You want it to be round and smooth and soothing to drink from. Also clean up where you handle it, and where all edges connect.
Wait until they are bone dry to greenware stage, then fire in your kiln at cone 04 on slow speed.
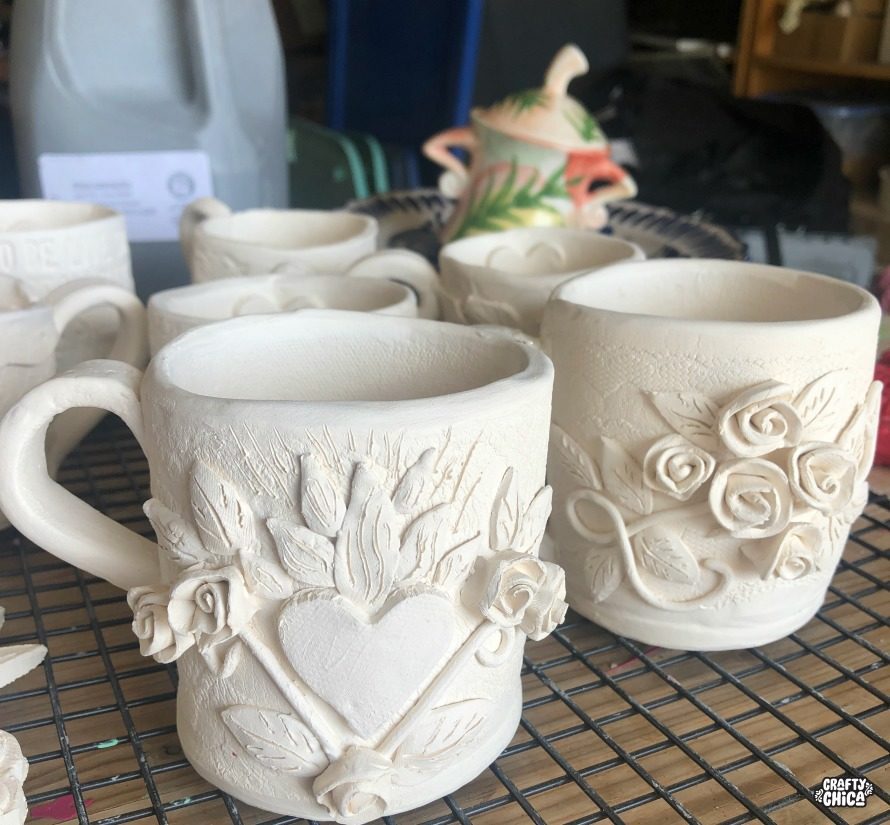
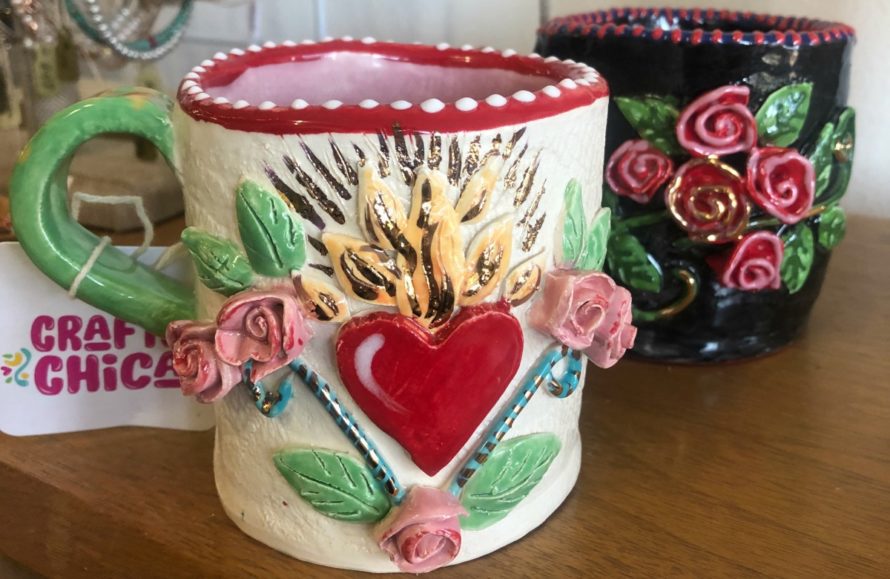
After they are cooled, remove from the kiln and now you have bisque mugs! Use your favorite underglazes to add color, then clear glaze. Fire again at cone 06 on medium speed.
Thanks for checking out my post about a beginner’s guide to hand built pottery mugs!


What brand of clay and glaze do you use? I’m having trouble with crazing in my glaze (I also use low fire clay)
I use low-fire Amaco white clay and Colorobbia clear dipping glaze…
I’ve been admiring your work for years.
Seriously, is there anything you can’t do?
Necessito das medidas. Por favor. Grata.
Thank you for all the help