By Rina Gonzales of MothershipScrapbookGal.com, special for CraftyChica.com
Hi guys! Welcome to this Halloween wreath tutorial, it’s my first post as a CraftyChica.com paper arts contributor! One of my favorite crafts to make is holiday and seasonal wreaths. They are a fun way to show off your personality right there on your front door. And if you have a nice crafty stash of (clearance) items like I do, they are really easy to whip up … a great way to use up all those extra embellishments.
You can make a wreath like this in about 30-45 minutes. What makes this wreath even more special is that I customized it by using die cuts and specialty papers. And the candy corn duct tape gives it a bright and bold background. Definitely one-of-a-kind!
SUPPLIES:
Sizzix Big Shot
Sizzix Food Jar Die by Eileen Hull Designs
Small foam wreath
Duck tape (Candy Corn pattern)
Ribbon
Kraft and black paper
Stickers
Skull embellishment
Twine
Foam dots and 2 punched paper pieces
Scissors
Hot glue gun and glue sticks
Directions:
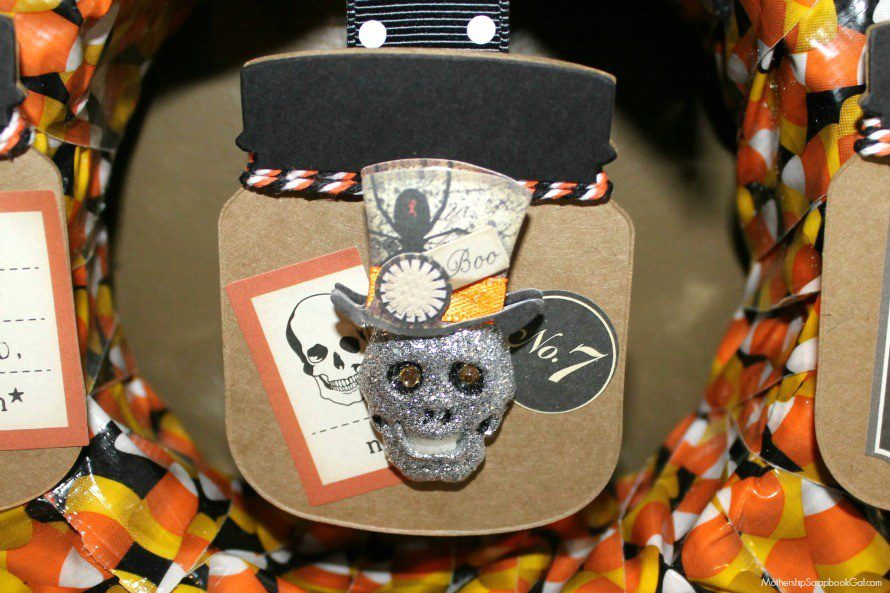
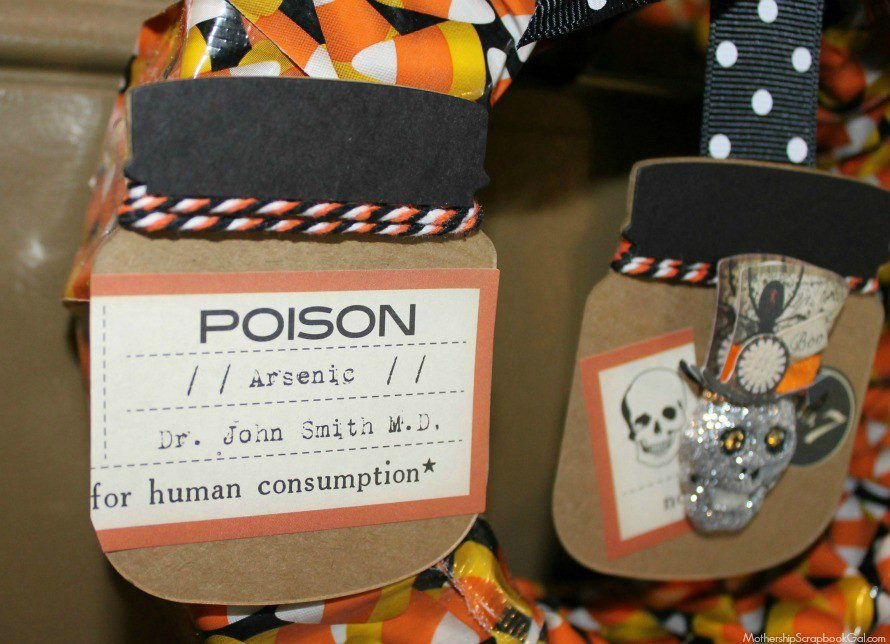
Step 1: I die cut my 3 potion jars with kraft and black paper using the Sizzix Big Shot and the Food Jar Die. You will need to trim the black paper to look like a jar lid. You will then use double sided tape, or glue, to adhere the black paper lid to the kraft paper jar.
Step 2: I then decorated my potion jars with spooky Halloween stickers and a skull embellishment that I got last year on clearance at the craft store. When I posted my photo of this wreath to show my design team – they were loving that I had a potion jar labeled “Worm Warts”. I think it would be easy to make up your own labels too using chalkboard labels and a chalk marker. I then added twine to the jars to add an extra texture to the jars. The twine I used is by Maya Road and it is a black, white and orange combo – perfect for Halloween crafts!
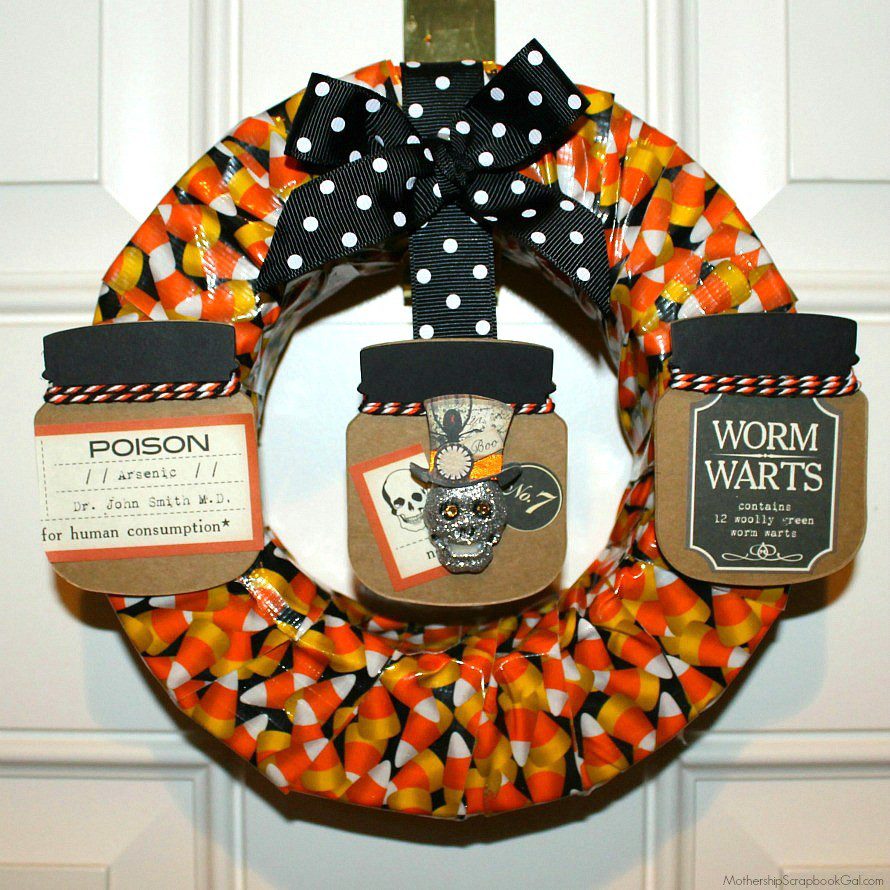
Step 3: I then took my mini foam wreath and wrapped it with Candy Corn Print Duck Tape. It took about 8 long strips of tape to wrap the wreath. Duck tape can be tricky to work with – but if I can do it, so can you.
TIP: I got my foam wreath at the dollar store.
Step 4: I then took a piece of black and white polka dot ribbon and tied it into a bow. I took another piece of ribbon and hot glued the bow and the jar with the skull to the ribbon strip. I then pinned the ribbon strip at the top of the wreath.
Step 5: I placed 2 large foam dots onto the sides of the wreath where I wanted to attach the other 2 potion jars. I then put a large punched paper circle onto the foam dot and hot glued the potion jars onto the paper circle.
Feel free to rearrange to your liking!
If you like this project, check out my other October-themed paper crafts (click on the title for the link)!

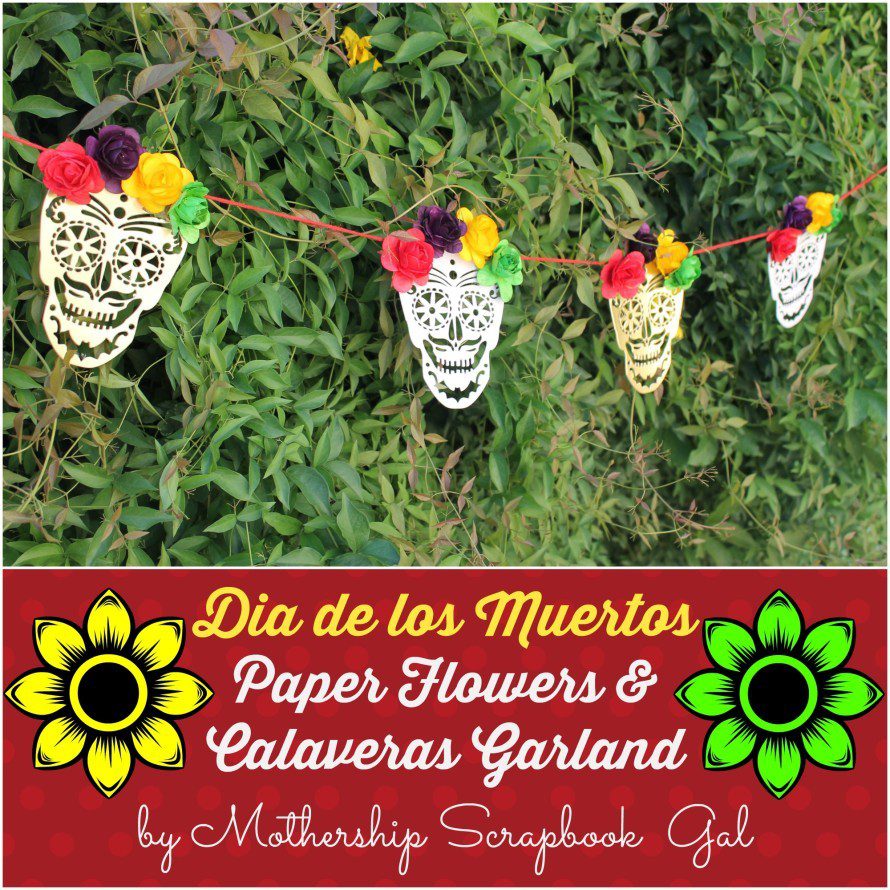
Dia de los Muertos Paper Flowers & Calavera Garland: Day of the Dead is not associated with Halloween, but I couldn’t NOT share this cute idea for celebrating Dia de los Muertos on Nov. 1 and 2!

Rina Gonzales, the owner of Mothership Scrapbook Gal, is a craft events host in Southern California. A lawyer by day, the creative process helps her to relax and de-stress. She began a “scrapbook for hire” service to help busy professional moms with scrapbook projects such as baby, travel and family books. Rina also creates other paper projects including ready-to-go scrapbook layouts, cards, invitations, banners and tags.
Follow her around the web!
Facebook
Twitter
Pinterest
Instagram