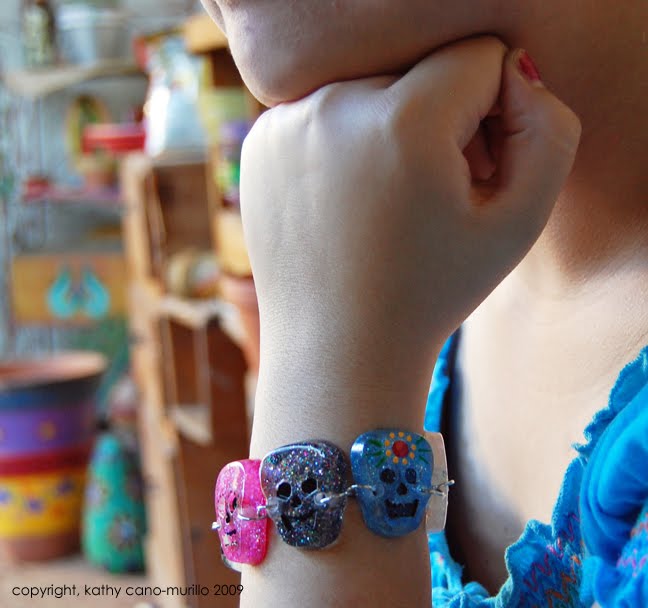
I’m always on the hunt for new silicone molds to use with resin. So when I came across a skull ice cube tray, I just about did a back flip at the craft store!
Silicone molds are mostly used for baking, but I always buy a separate set for crafting. Soap, candles, and my favorite – two part resin – makes for some fun experimentation. For this design, I drilled holes and made a linked bracelet, but the skulls can also be used as charms, magnets, or as objects for mixed media or shrine making. NOTE: Once you use your molds for crafting, you cannot use them for baking!
Supplies:
1 silicone skull ice cube tray (found at most craft stores during Halloween season)
Ice Resin Jewelers Grade Clear Casting Epoxy Resin 8 oz Kit![]()
Glitter
Paper cup, chopstick, drinking straw
Handheld rotary tool
Spray high gloss varnish
Bracelet clasp
Needle nose pliers

Directions:
1 Make sure the mold is dust-free.
2. In a paper cup, add two capfuls from each bottle. Stir with chopstick for one minute, making sure the two parts are thoroughly mixed.
3. Carefully pour into molds, only pour a thin layer so your charms won’t be too thick and heavy. Use the drinking straw to blow out bubbles.
4. Pour glitter on top of the resin. Let it cure for 24 hours.
5. Pop out skulls from mold. Drill a hole on each side using the handheld rotary tool.
6. Outside, spray with varnish, let dry for a few hours.
7. Use needle nose pliers to add jump rings between each skull. Add clasp.
Tip: To add more flair, decorate with acrylic paints before adding spray varnish. See picture for example.
Check out my new book!