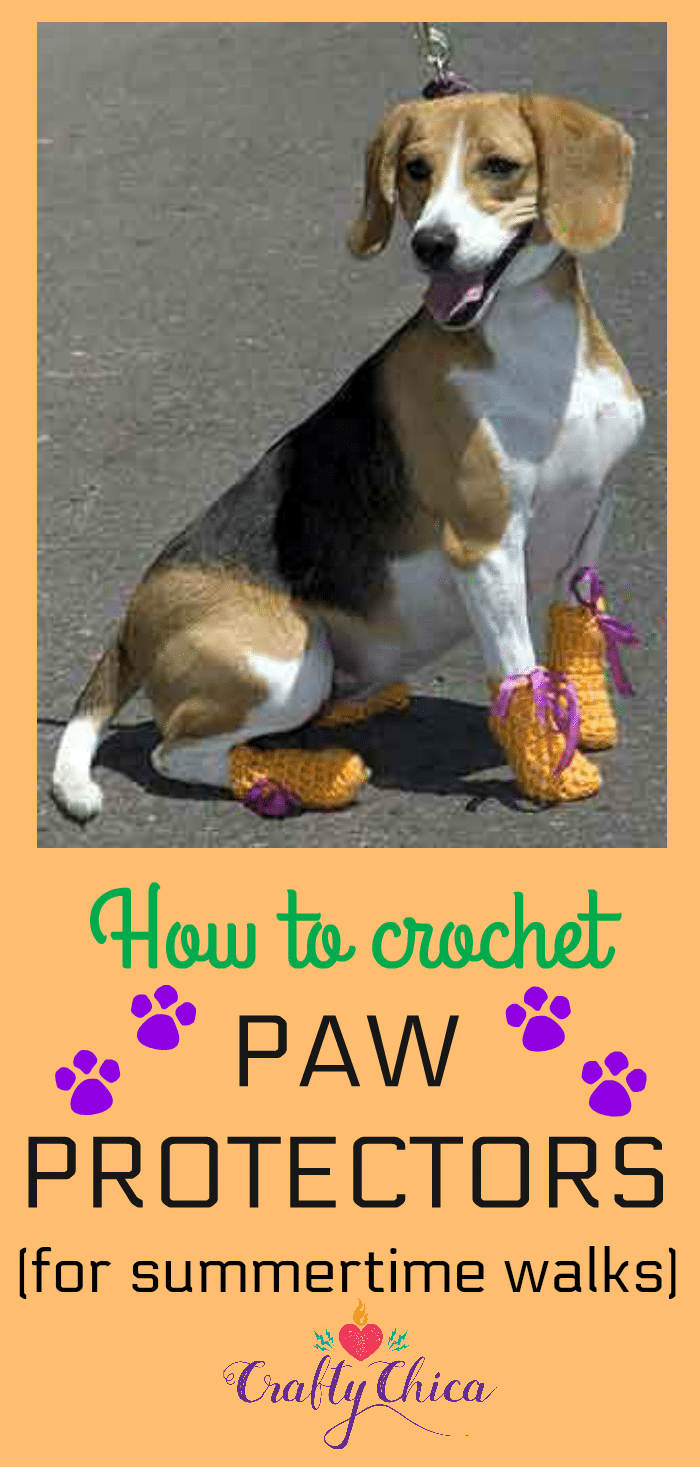
This DIY dog paw protectors project is dedicated to my sister’s former pooch, Lola. She was my sister’s beloved beagle. When she was alive we liked to take her on walks. But when the Arizona pavement was hot enough to melt a stick of butter, an outing was out of the question. I crocheted these booties from lightweight cotton yarn. Lola loved them because they protected her paws from the hot pavement. She gave them five barks and four paws up!
I hate to see people walk their dogs on the hot asphalt and when the poor puppy run towards the grass, the owners tug them by the leash and say, “Come on! Behave! Stay over here!” I even saw one dog stepping in his owner’s footprint shadows thinking it would be cooler.
These paw protectors don’t take very long to whip up. They are a fashionable way to protect your pooch’s paws from the searing pavement. You can buy a set for $20 at the pet store, or take up the art of crochet and make your own for less than a dollar and less than an hour’s time. This project is perfect for summer; the loose crochet stitches combined with lightweight cotton yarn will keep those footsies cool from top to bottom.
Supplies for diy dog paw protectors:
Measuring tape
1 skein of lightweight cotton yarn
1 Size J crochet hook
Scissors
24 inches of ribbon
Directions: Measure the width of your dog’s paw. Next, measure the length and add two inches to that number. This is how wide and long you need to make each bootie. For a medium-size dog: Begin by holding the end of the yarn, making a slipknot and inserting the hook through the loop. Make 6 or 7 chain stitches; at the end, join them to make a circle. Begin to create the bootie by adding stitches around the circle, using the double stitch. Continue to build up to desired height and then finish off. Cut four pieces of ribbon, each 8 inches long. Weave a strand through the top row of each bootie so you can tie it on the dog’s paw.
Variations: For smaller dogs, decrease a number of chain stitches; for larger dogs, increase. For more durable booties, sew a small piece of suede onto the bottom. Add decorative stitching at the top. If you do not want to crochet, you can make the booties out of fleece and use Velcro straps for closure.


OMG. I love the dog! Soooooo cute!
Our gracious furred companions deserve a break! These are adorable and serve a giant “walking purpose” on the hot asphalt and cement!
What a cute idea! The pavement can be very hot for poor little paws.
OMG those are so dang cute
What an absolutely great idea! Although I don’t know how long I could keep them on my three lazy Labs. You could even bling them out with some Swarovski Rhinestones for an evening look. Ha Ha!
Duchess
From Artbeads.com
WONDERFUL! Thank you.
-nisipici
OOOHHHH! I’ve just got to make these for my Sassie & Saddie!!! Their Momma will be so tickled!
Functional and crafty-adorable, I love it! I’ll be linking.
You realize that dogs have survived hundreds of years without Puppy Paw Protectors
You realize that there was no pavement back then? Idiot. No empathy for our fur babies?
Good point, I’m glad you mentioned that. Yes, they have. But these are for domesticated dogs that live and have been raised indoors. Our vet said their paws are as soft as humans feet and therefore they get scorched in the heat when walking on the hot pavement.
These are awesome – I am going to have to see if I can remember how to crochet! I linked to this entry from http://www.victoriadogs.com — Lola is adorable!
So glad I found your blog and this pattern especially. I do dog rescue and specialize in handicapped dachshunds. This will help protect their back feet. Love the beagle too.
Love this! We don’t walk our Lola here in GA bc of the hot pavement. We don’t even let her go with us to club the mail bc the driveway is so hot even in the mornings. Some people r so ignorant when it comes to pets. Sure they survived w/o paw protectors but that also was during the times before concrete and asphalt . My rule of thumb for my animals is if it will hurt me it will hurt them. Just use common sense people!
making these for my dog to protect her feet from the cold when I put her out. she loves to go out in the snow but the cold bothers her feet
Update – our little Bootsie pulled his back and his hind legs are slowly coming back to life. The vet suggested we get him booties with grippers to make it easier for him to walk on the tile floor without sliding. I used puffy paint on the bottom of the booties, it worked!
Thanks for sharing this. We live in Michigan and right now we have -20 and lower temps. Our poor red bone cant handle the cold on her feet when I take her out. Now she wont have to worry about it cause I’m getting started on these for her right now. Thanks again:)
I know it’s been a couple years since this was posted, but I’ll give it a try anyway. Did I miss something or which “double stitch” should we use on the round?